1-conversion of RGB image into Greyscale
2-coloring the portion with others in greyscale mode
3-techniques of B/W conversion using adjustment layer
---------------------------------------------------------------------------------------
Original Blond Girl Image
 - I choose this image because I like the unique of the object related to each other..
---------------------------------------------------------------------------------------
Step-By-Step
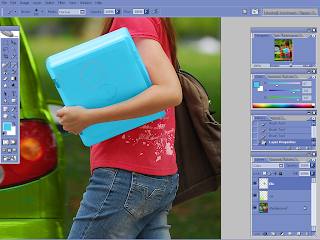
-First, I imported the original image to the photoshop software...
-I add new layer and rename it as car...
-Then, I choose the color mode instead of using the normal mode layer...
-I use the paint brush tool to change the colour of the car...
-I changed the colour of the car from dark green to light green...
-With using the '[' and ']' keys, I can control the size of the brush that I want to use it...
-And also, to view the image clearly, I used the 'Ctrl + 'C' + '+' for zoom in...and 'Ctrl' + 'C' + '+' for zoom out...
-I used the same technique as car...
-but I changed it to different colour...
-I changed from Pink file to Blue file...
-I used the same technique as car...
-but I changed it to different colour...
-I changed from Brown bag to Red bag...
 -changed the colour of T-shirt-
-I used the same technique as car...
-but I changed it to different colour...
-I changed from Red Shirt to Green Shirt...
 -changed the colour of the jeans-
-but I changed it to different colour...
-I changed from Red Shirt to Green Shirt...
 -changed the colour of the jeans-
-I used the same technique as car...
-but I changed it to different colour...
-I changed from Blue Jeans to Brown Jeans...
-I changed from Blue Jeans to Brown Jeans...
-I'm changing the background image into Grey scale...
-I set the colour to default by pressing the 'D' button....
-Then, as usual...I'm using the brush tool to apply into it...
--------------------------------------------------------------------------------
Output
-I set the colour to default by pressing the 'D' button....
-Then, as usual...I'm using the brush tool to apply into it...
--------------------------------------------------------------------------------
Output


No comments:
Post a Comment